Showing posts with label small sewing projects. Show all posts

Thursday, February 10, 2011

a few things....

I have this amazing girlfriend, who happens to be the most generous and kind hearted person......so much so that she was willing to share some of her Wollmeise loot with me.


For those of you that don't know Wollmeise, it's like the FMF of the yarn world. I was so thrilled that I couldn't prevent myself from immediately winding it and starting a new project!


This beautiful yarn is a dream to knit with and I am so excited to be starting my first shawl. The pattern is called Trillian and can be found on Ravelry.

I also received an order in the mail of some new Madelinetosh......I have such a serious addiction to this yarn, I want it all!! It's all so YUMMY!


As for sewing, I did manage to make a few project bags for my girlfriend as a thank you.


I especially love the FMF bag and I actually used up a good amount of my small scraps.


Now, back to my needles....I have about a dozen projects in the works, I am definatly in a knitting frenzy.

Sunday, September 26, 2010

that girl is a genius

A while back I stumbled onto Elizabeth's tutorial on how to make a TV tray pressing table. I loved the idea from the get, but it got put onto the long list "things I wanna make", which quite honestly never seems to get done. Then we moved, my sewing space shrank and neither one of my ironing boards seemed to work on a daily basis....so guess what popped into my mind this weekend??


My sister was kind enough to pick me up a tv tray, then after spray painting it white and soliciting my husband to help...I have a new ironing table. I have to tell you that that girl is a stroke of genius. This little table is not only the perfect solution to my creative space, but will also be a breeze to take with me to my weekend LAMQG sews. Small, portable, works great for piecing all my blocks and to top it off, it's cute. What more could a girl ask for?


Well, except for an entire sewing room filled with unlimited amounts of fabric and a pressing table big enough to press an entire quilt top at once....but we must live in reality, right?

Covered with a linen cotton blend by Lecien found at Fabricworm

Friday, September 3, 2010

this. that and getting unpacked

Let me apologize for slacking on this blog for so long....I can't believe it's been over a month since my last posting!! We are finally all moved and mostly unpacked. I can honestly say that I completely under-estamated how hard this move would be!! It was completely overwhelming and had me feeling like my whole world was turned upside down!! I know in part that my personality didn't really help (I am a bit on the OCD side...and can't handle things being out of order) plus enrolling and registering the boys in 3 different schools, signing them up for athletics and starting my taxi services back in forth from the multiple practices a day. To top it off my husband has been going out of town for 3 days every week for work...it's a wonder that I'm not completely grey by now (just added some to the collection). I wish I could say that I am super woman and pulled it all off without a hitch, but sadly I am not, and apparently me and moving just don't get along!
But yesterday I finally turned a corner...the house isn't fully unpacked yet, but it's close and most importantly, Nina got unpacked!!


This is my new sewing corner...I am really looking forward to breaking it in! 
Before I packed my machine up, I made her a new cover for the new location.


I was inspired by Megan's sewing machine cover to try my hand at the flying geese...and I just adore them! They were so fun to make (and a bit challenging) but most of all I just love looking at them!
For the inside of my cover I used a Kei pattern that I stashed a while ago with no purpose.


The quilting on it turned out really nice too....even despite the fact that some of my geese were flying a little crooked!! 


Lastly, I couldn't resist the temptation of Oh Fransson's new quilt-a-long. I loved her original version of the Tokyo subway quilt...and the one she designed for the quilt-a-long is just irresistible. So, as soon as Nina was put on her perch, I started sorting my scraps.


Originally I wasn't going to buy any new fabric for this project, but with only 3 purple scraps and no purple stash, I have no choice but to buy some! Its one of those moments I wish I had a quilting neighbor that I could borrow a cup of scraps from (i've got plenty of sugar)!

Saturday, July 3, 2010

the softest ever

Theres something about moving into a new place that makes me want a fresh look. New colors to add an element of excitement to the change. So, last week during my faze of procrastination, I made the softest pillows ever...


Made with little folks voile on the front and essex cotton/linen blend in putty on the back. I find the voile fabrics a bit tedious to quilt with...but worth all the effort. 


I went all out and did my first zippered pillows. I have always been too intimidated to try putting zippers in my pillows, but then I stumbled onto the best tutorial by Katie from Sew Katie Did. She made putting zippers in as easy as 1,2,3!


The pillows are so inviting that izzy couldn't resist the temptation of just jumping on the pile while I was trying to photograph them! 


Then proceeded to roll around and bury herself in them! She always seems to do exactly what I want too, with no hesitations.

Wednesday, June 30, 2010

hexagon tips

Just a quick pop in post before I go back to my packing! I have had quite a few people ask me to share some tips on how I sew my hexagons. It took me a long time (months) to find a technique that worked for me and I encourage everyone to try several different stitches to find the one that works best for them. 

First, I straight stitch along the edges of two hexagons, making sure to just skim the top of the paper inside. Making sure to pull my thread nice and snug. You want it to be as tight as possible without causing it to ripple.


Then once I reach the other side, I back (straight) stitch in the opposite holes of the original straight stitch...


When finished it will look like a solid line of stitches (please excuse my inconsistency, I am working on that part....luckily it doesn't really affect the outcome). The back stitch evens the tension of the original straight stitch and helps get rid of the tugs on the front of the hexagons.


And thats pretty much it. If you make sure your stitches are nice and tight it should look like this...


 I do have to admit that it does add a  little time onto making hexes when sewing this way. The whip stitch was much faster, but I couldn't get the tension on the fabric consistent enough not to tug on the front. The ladder stitch that Heather taught me was amazing, but I was WAY too slow at it to keep it up....but her technique is how I discovered that the tension on the fabric was the key (thanks again Heather). 
Just a few extra notes:
I use a hand quilting thread (100% cotton by Gutermann) for extra strength. I kept breaking all the others when pulling tight to keep my tension right. 
I use a quilter's knot in the beginning of all my threads. It is thick and strong enough not to pull through the fabric when pulling tight.
Last but not least...I only iron my hexes with the paper in place. Once you remove the paper ironing can pull on your fabric and stitches warping the end result. So once all my hexes are sewn together, I iron them one last time and then carefully remove all the paper.


Here is a block that I made in my down time this week for my son's quilt. I told him that the grey seeds prove my love for him!! I had a precious little of the FMF grey seeds for my hexagon quilt and sacrificed most of it for his quilt...now that is mother love or maybe just plain insanity!!

Wednesday, June 2, 2010

i got it!

Thank you...to everyone for all your tips and words of encouragement. I have finally got it! My stitches are looking much better, thanks to all the great advise and guidance. 


Heather very patiently helped me get my ladder stitch down (finally)....and although it wielded great results, I was too slow at it. I think it would take me a few years to finish if I kept it up, so I have finally settled on a straight stitch. Mainly because I can actually move at an exceptable pace (i do however still think it will take me a year to finish). To get a little extra practice and to see what my hexes would look like quilted, I made this.......


This will be shipped out in the mail to a friend as a little surprise gift, hopefully she likes it! I am new to making potholders and need much improvement, so hopefully she doesn't mind it's imperfections!! There is a bit of decorative hand stitching on the inner edge...I am not sure it really shows up in the pictures but if it does, it was completely inspired by this binding, made by Red Pepper Quilts.
Outside of that, there hasn't been much sewing going on around here....and I fear there won't be for a while. I am off to Portland tomorrow for a 4 day visit with one of my dearest friends (YIPEE)! It is a mild stone for me, I have never left my family for such a long period of time before and am a bit nervous!! Although, I am looking forward to the R&R, pure girl time......and of course the shopping!! Any suggestions of shops that are a must see? Then it's graduations, trips to Disney, Knotts.....and a month of packing up our house. We are moving up to Orange County in July and after 6 years in this house, I think it will be quite a bit of work to get it all packed into boxes. So if I am not around much for the next few months, you know why!

Wednesday, May 12, 2010

all covered up

My ipad is all covered up and protected from little fingers!
I had so many different ideas on how to make my new cover and what I wanted it to look like, that it was really hard to decide on the final design. I tried to focus on what I wanted the cover to accomplish: keep it clean, hold in snug inside so it won't fall out into my handbag, allow me to charge it without taking it out of the case,  have a place to keep my earphones and cleaning cloth, and lastly match the sleek modern design of the ipad itself. 
With all that in mind, this is what I came up with:


I LOVE IT!! I knew I bought that Echino print the other month for a good reason (other than being too cute to resist). Its  modern, matches my ipad and......


has a handy pocket on the back. This is the first zipper pocket I have ever done and I love the look and functionality of it! Luckily, since I had no idea how to do this myself, I found this great tutorial here.
The inside of the cover and the pocket is lined with a black and grey dot fabric that I found at Superbuzzy (which is one of my favorite online shopping sources), that matches perfectly. 


The open top feature is easy to close and allows me to charge my ipad without removing it from the case first, so no dust settles during charging. Mission accomplished!!

Wednesday, April 21, 2010

small distractions

Do you ever get distracted from the task on hand? For some reason, I am having a hard time staying on task this week. I don't know if it's because my AMH quilt isn't living up to my expectations, or if it's because my daughter has been really needy this week.....all I know is that I keep finding myself doing everything except what I should be doing. The only good thing about getting distracted is the small items that come from it. 

First up is a mini dresden plate (ok, I admit it...I am a little dresden addicted) on yet another doll quilt.


Originally this was supposed to be a thank you gift, but my sweet baby girl found it and claimed it as her own (to solidify this claim of property, she spilled juice all over it..therefore forcing me to wash it and coaxing me into letting her keep it). So I will have to make another.

Next: An owl pillow for my Izzy's reading chair. 


I made this pillow in a desperate attempt to prevent myself from buying the owl pillow at Pottery Barn Kids....but it didn't quite do the job. I just don't love/like it. Izzy seems to like it (which is the only reason it hasn't been tossed into the donation pile) but I am just not convinced.

Lastly: these adorable little baskets for Izzy's stray crayons and little misc. toys. 


I liked the first one so much that I had to make a second one! I used this tutorial over at Pink Penguin to make these little baskets and really enjoyed the process. Outside of giving me a great reason to use some of my Kokka ballerina fabrics, these baskets also gave me an excuse to cut into my Kona Essex cotton/linen blend. Which is slowly becoming my new favorite, staple, must have in stock, fabric. I currently own it in two colors: natural and putty (which is what i used) but have some more selections on the way from Sew Mama Sew. I am totally planning on making myself some of these baskets, only super sized...but won't even allow myself to get started on them until my quilt top is finished!!

Wednesday, April 14, 2010

not your normal cup of starbucks

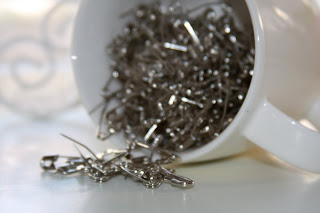
I'm not sure about you, but I seem to have an abundance of pins (straight and safety). I never really know where or how to keep them but I do know that I need ALL of them (when basting or binding, I use a massive amount of pins). But what does one do with all those pins??


Today was the day for me to figure it out (plus it totally diverted my attention from my little folks quilt which is not coming along as nicely as I hoped).
 Now a little known fact about me....i L-O-V-E starbucks, one could say that I am darn right addicted (the worst part is that I don't even drink coffee.....it's the chai that has me hooked)!! Well, I figured if it can keep me happy in the mornings....it could keep my pins happy all day long! So I went to starbucks...picked out a cute little mug...and got sewing. 
FYI sewing the round wasn't as hard as i thought it would be.


I adore everything about my new pin mug!! All of the safety pins live on the bottom and my straight pins live on top....nice, cute and condensed. 


I even went as far as filling the pincushion with crushed walnut shells to keep my straight pins nice and sharp. I will also be honest enough to tell you that a good portion of crushed shells now live inside my vacuum cleaner. Note to self: buy a funnel.


Although, I may buy a back up mug...because I am also really clumsy and that mug is porcelain. 
I just got finished taking apart my first little folks quilt and am getting ready for round two....hopefully I will like it the second time around!!

Monday, April 5, 2010

my girl

I hope everyone had a wonderful holiday weekend!!
Our holiday was full of deviled eggs, chocolate eggs, plastic eggs and ham.

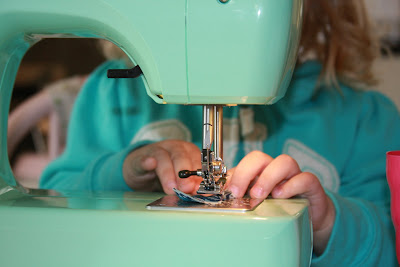
The time I set aside for working on my quilt was quickly diverted to my girl! Now, I have to tell you that she takes her sewing very seriously.....
and stays very focused on her task.

(Don't worry, the needle has been removed to keep those little fingers safe!)


Last week Joan (wishes true and kind) had shared the idea with me of putting up a design wall for Isabella. All I can say is...thank you, thank you, thank you Joan. I initially liked the idea because of the cuteness factor, but as soon as it was up I loved the idea because of how much Izzy enjoyed her new found creative outlet.

She took to it immediately and surprised me with how long she was fully content designing.
(try not to gasp too hard over the fact that she has some of my little folks scraps, she was very gentle with them)


She spent her morning choosing fabric, pressing fabric, and putting it on her design wall...all with such intense purpose and determination. I loved every second of it!!

I made her fabric holder this weekend using the kidlet pattern (by JC handmade found here). I altered it in size then added straps to hang off the back of her chair, it works perfectly.
I couldn't resist making a second one for her coloring books....and to be honest, I think there will be a kidlet hanging from every door knob in my house by the end of the week! It is the perfect size and remedy for those miscellaneous things that really have no home.


Tuesday, March 2, 2010

purple dots

I tend to take my daughter with me when I go fabric shopping. Now usually she is napping on these adventures....but on one of our trips she decided to stay awake for the event. As I was taking my time browsing fabric (looking for nothing in particular) my sweet baby girl decided to do some shopping of her own. She became very enamored with this purple dot fabric. Purple is a color that for some reason I do not ever pick up....but that cute face combined with her excitement of finding something she liked, gave me no choice but to buy it. With that said, after finishing my quilt the other day, I was really itching to do some more sewing, but not really ready to start another big project.....so....

another doll quilt was born. My daughter anxiously awaited her new quilt, coming over to check on it's progress periodically. As soon as I finished it, she snatched it up, ran to her bedroom and put it into her doll's cradle. I couldn't persuade her to let me take it back out to photograph....so I had to make do and take pictures of it in the cradle (although she did let me adjust it a bit so that is wasn't so crinkled up).

To my surprise, I love the way the purple dots look combined with all the other fabrics. I also have to admit that I love the pillow even more than the quilt!! I think my daughter feels the same way since she has been carrying the pillow around the house for the last few days.

Baby also seems to be quite happy with her new quilt! It didn't take Izzy long to find baby and snuggle her into her new quilt for a nap.